PROJECTS - CDR Tools Front End - Translation HOWTO
General notes and terms used
language directory - "language" is a subdirectory of the directory you have installed the
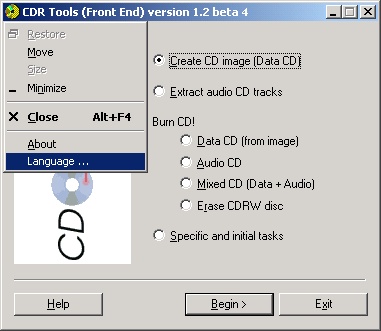
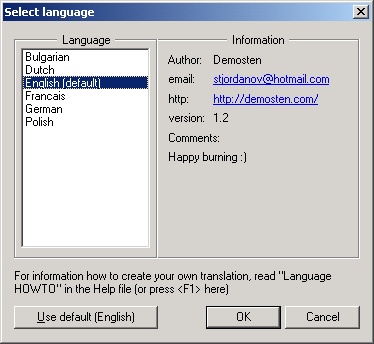
CDR Tools Front End (\Program Files\cdrfe by default)"Select language" dialog - This dialog appears by selecting "Language ..." from the application system menu.
System menu is the one showed when you click on the running application icon (in the upper left corner of the main application window).
Creating new translation step by step
- Create new .INI file from a template. You could use a copy of Example.INI
(the English template) included with CDR
Tools Front End installation or a copy of some other .INI file
in your language directory containing a language you will translate from.
All INI files there (*.ini) are checked for a valid language format
and displayed as available languages in the
"Select language" dialog.
It is a good idea to use a language name as a file name but this is not
compulsory. The file name extension must be INI. Examples: English.ini,
Bulgarian.ini or YourLanguageName.ini
- Open your file with a text editor (like notepad).
- Fill up the necessary fields in
[MAIN] section. Only "language="
field is compulsory.
- Start replacing the text in other fields with text in your language. Please
try to keep your translated text as short as possible in order to fit in
within Front End dialogs. Some translation hints:
\r\n means new line (in fact \r is ignored
and \n is the new line)- Please note
%s, %u and %d strings,
and keep them inside your translations. They are replaced later by the
Front End (%s with a string, %d with a number
and %u with an unsigned number).
- Every time you open a dialog, it reloads its translation. You won't
have to restart the Front End every time you made a change (just close
the dialog and reopen it to see the result). Don't forget to save the
.ini file before preview it as I did in the beginning ;)
- Save your file as a plain text file
- Please send your translation to me (
stjordanov@hotmail.com ) so I can include it in my CDR Tools Front End installation.